Install: Difference between revisions
Crmtogether (talk | contribs) No edit summary |
Crmtogether (talk | contribs) No edit summary |
||
| Line 2: | Line 2: | ||
The notes are useful though if any of the install process wizard fails. | The notes are useful though if any of the install process wizard fails. | ||
============================== | |||
Upgrading CRM: When you upgrade CRM it typically wipes out the application setting in IIS on the CRViewer folder. So you have to get the latest install (from the portal) and run that. Typically you will not need to reinstall the CRM component file. | |||
============================== | |||
Installation steps: | Installation steps: | ||
Revision as of 16:49, 1 September 2014
- As of May 2014 the installation now runs from a wizard that should step you through the process.
The notes are useful though if any of the install process wizard fails.
==================
Upgrading CRM: When you upgrade CRM it typically wipes out the application setting in IIS on the CRViewer folder. So you have to get the latest install (from the portal) and run that. Typically you will not need to reinstall the CRM component file.
==================
Installation steps:
1. Install the Crystal Runtime files from 'CRRuntime_32bit_13_0_1.msi' on the server (Crystal Reports is not required on the server)
2. Install the component
Log on to CRM and navigate to the “Administration”->”Customisation”->”Component Manager”
Add the CRViewer.zip component to CRM
Browse and click “upload new component”
The component should be displayed in the “Available Components” list
Select the component and Click “Install Component”
On the following screen click “Install Component”
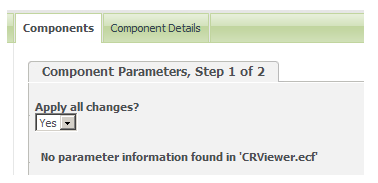
When done your screen should say that the install has been completed
Click “Continue”
You will see then that the component is listed as installed
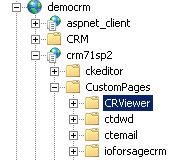
3. Open IIS Navigate to the ‘CRViewer’ folder in your CRM install
And select the “CRViewer” folder
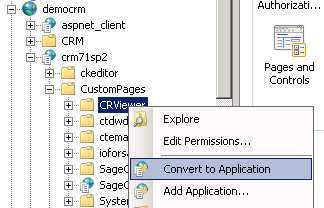
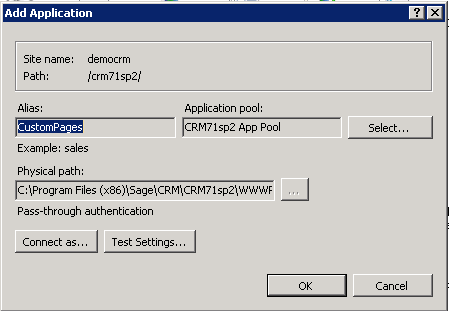
Right click and select “Convert to application” (for older versions of IIS you may be required to complete this step via the properties window)
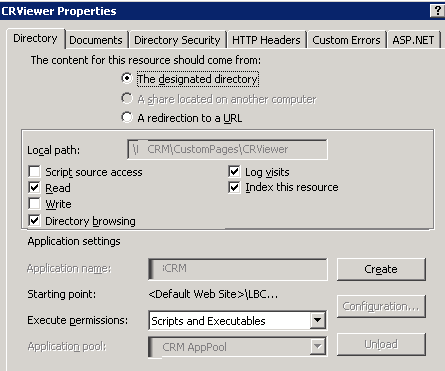
IIS Properties window - click "Create" to create the application
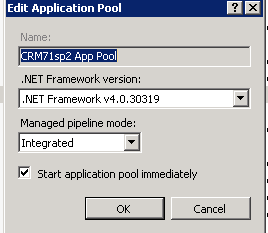
Ensure that the Application pool is the same as the CRM application pool and that the .Net Version is 4.0
The ‘CRViewer” is located in the Administration->Email and Documents -> CRViewer
You first off need to configure the settings and database connections (max of 4 dbs). This is done from the ‘Config’ menu.


